
August 6, 2026
Wind-Driven Rain Around Window Trim After Recent Storms
A window can look fine from the yard after recent storms while the trim below it stays damp, a rust streak appears at a fastener, or the wall finish inside shows a new stain. Those signs do not identify the entry point by themselves. Wind-driven rain can move across the face of a wall and reach gaps that stay dry during an ordinary straight-down shower.
Start with the whole window opening
A qualified professional should compare the glass, frame, exterior trim, sill, head flashing, sealant joints, siding or brick transitions, and the wall finish directly inside the opening. The most useful inspection follows the moisture pattern from the highest plausible entry point down to the visible stain. Water at the bottom trim may have entered at the head of the window, behind the cladding, or through the window assembly itself.
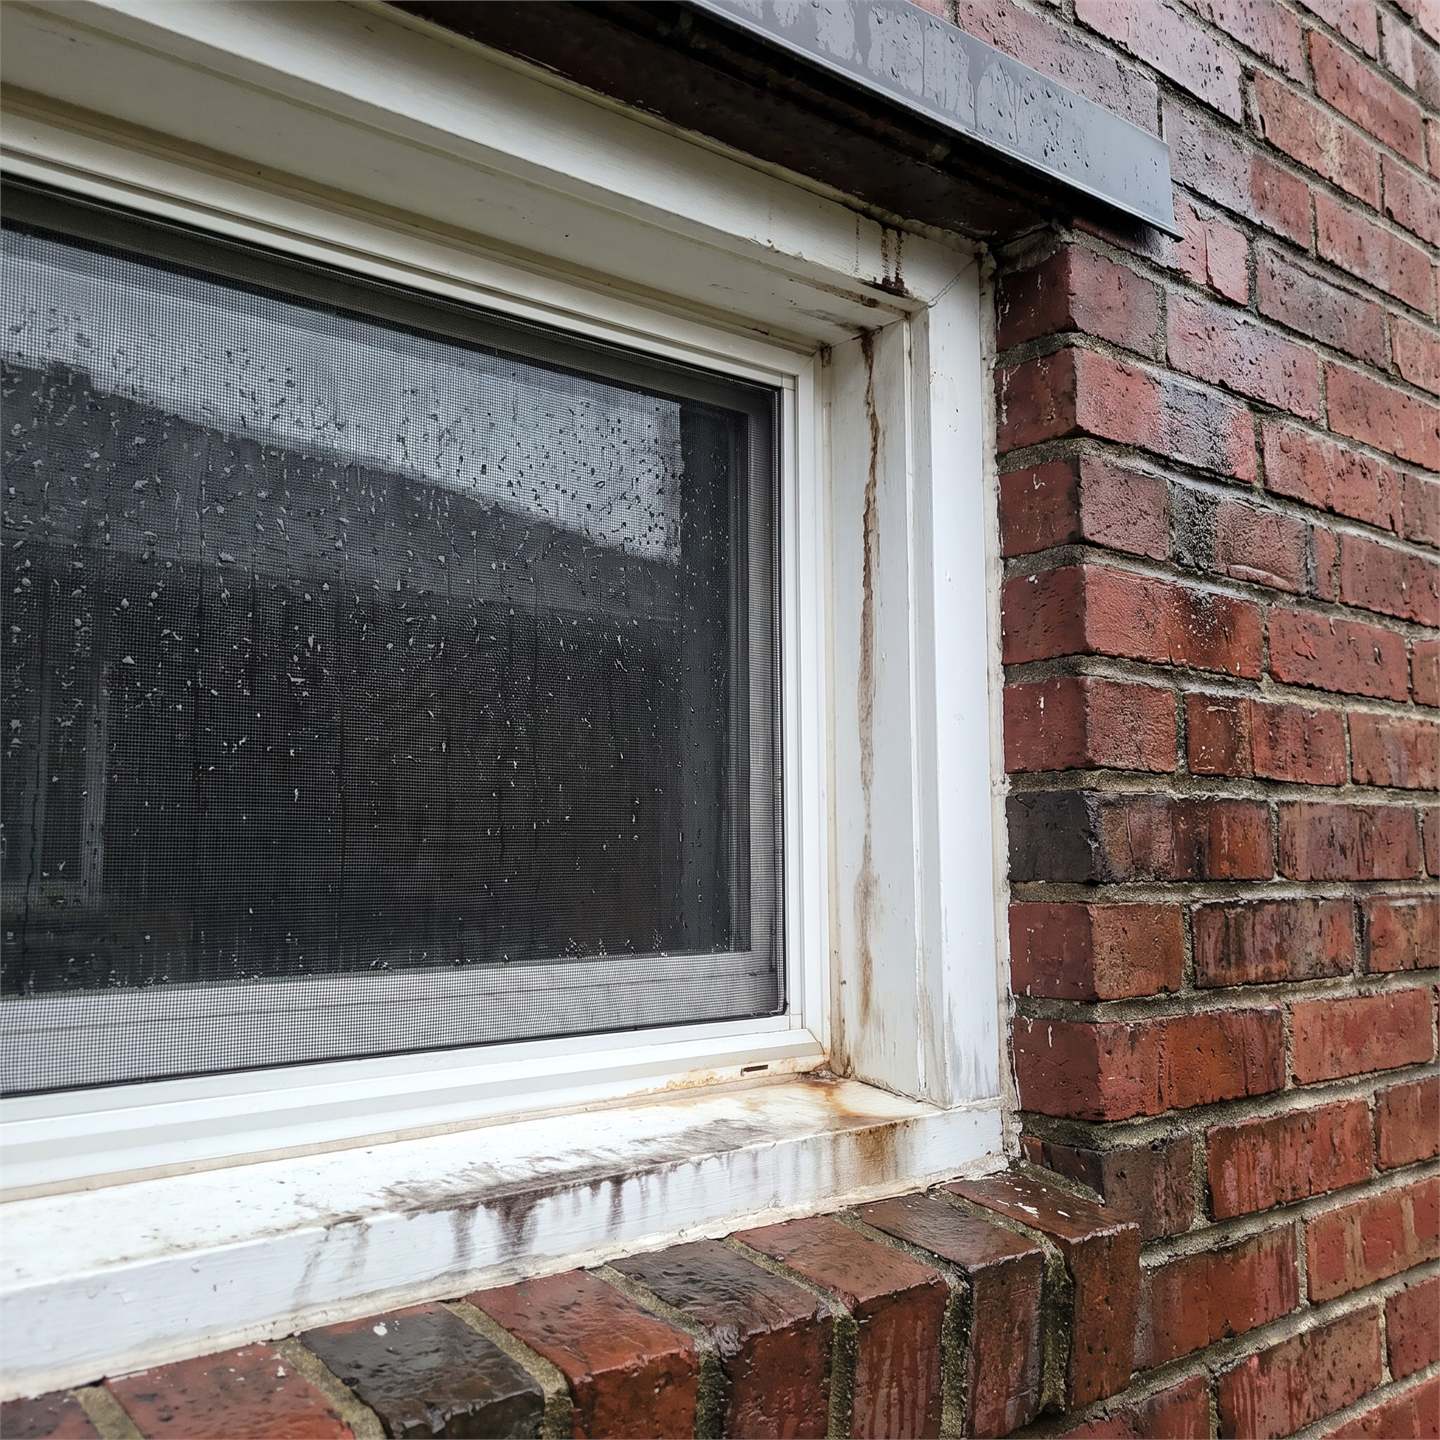
The inspector should also look for swollen wood, peeling paint, soft trim edges, open joints, rusted fasteners, displaced flashing, and sealant that has pulled away from one surface. Those details help separate a fresh change from long-term exposure, but one symptom should not be treated as proof of storm causation.
Compare wind-driven rain with ordinary wear
Wind changes how rain meets a building. It can push water against laps, corners, and small gaps around windows and doors. FEMA guidance on water intrusion explains that flashing and sealing around these openings matter, while the window or door assembly must also resist water penetration. That means a bead of new caulk is not a complete diagnosis.
Age, failed sealant, missing or short head flashing, blocked drainage paths, prior repairs, and routine paint failure can create similar staining. A qualified professional should compare the exposed condition, weather side of the house, nearby roof and gutter drainage, and construction details before deciding what needs repair.
Match the repair scope to the entry path
A contractor scope that says only "seal window" may be too narrow if water is moving behind siding or trim. A full replacement may be too broad if testing shows a localized joint or flashing defect. The written scope should name the affected material and the work that addresses the actual path.
Check whether the inspection and estimate answer these points:
- Identify whether the water is entering through the window unit, around its perimeter, or from the wall assembly above.
- Compare the head flashing, sill pan or drainage path, trim joints, cladding laps, and sealant transitions.
- Note whether stained or softened trim can be repaired in place or whether concealed material must be opened for a reliable assessment.
- Match removal, flashing, weather barrier, trim, paint, interior finish, and testing line items to the same repair plan.
The Georgia storm and hail claim guide explains why the reported weather, physical condition, and repair scope need to be evaluated together.
A small stain can point to a larger scope gap
The visible mark may be limited to one corner while the repair requires removing trim or a section of cladding to reach the flashing. If the carrier estimate allows only paint or caulk, compare that line item with the contractor’s findings and the actual construction sequence. The difference can become an out-of-pocket cost when access, weather barrier repair, matching trim, or interior finish is omitted.
The opposite matters too. Replacing a window without showing why the unit failed can make the scope difficult to support. Policy language controls the coverage decision. The inspection supplies the component facts: where water traveled, which materials changed, what appears long-term, and which repair steps address the opening without guessing.
End with the window assembly, not the stain
Before relying on a surface-only repair, compare the contractor scope and carrier estimate against the qualified professional’s findings for the window unit, perimeter flashing, trim, cladding transition, drainage path, and affected finishes.
This article provides general educational information. It does not determine coverage or replace a property-specific inspection, policy review, or repair assessment.